A Continuous Integration approach for Kotlin projects

Continuous integration
Continuous integration is one of the words that you often hear nowadays. I remember not really getting it when I first read about it. I think that most people don’t get it right away. It’s one of those things that you don’t see the benefit before you need it, like an insurance or a sun lotion.
So, let’s try to tackle this one once again. What is Continuous Integration? Integrate what? And why should we continually do it?
As you can see, there’s clearly something missing in this term: the subject. Maybe it should be called Continuous ** CODE** Integration, but that may not sound so appealing. Now you might be wondering what this integration is. Here it refers to code merging. Let’s jump to a full definition:
Continuous Integration (CI) is a phase in the software development cycle where code from different team members or different features are integrated together. This usually involves merging code (integration), building the application and carrying out basic tests all within an ephemeral environment.
Successful Continuous integration means new code changes to an app are regularly built, tested, and merged to a shared repository. It aims to improve the quality of software, and to reduce the time taken to deliver it, by replacing the traditional practice of applying quality control after completing all development.
It’s also a solution to the problem of having too many branches of an app in development at once that might conflict with each other. The main benefits here is making sure that the code quality doesn’t decrease while keep this process small and automated.
You can check my DevOps series articles, where I go deeper about some concepts behind CI and automation. [A Primer]https://github.com/iurysza/thoughtbox/devops-primer/) The First Way
Pipelines
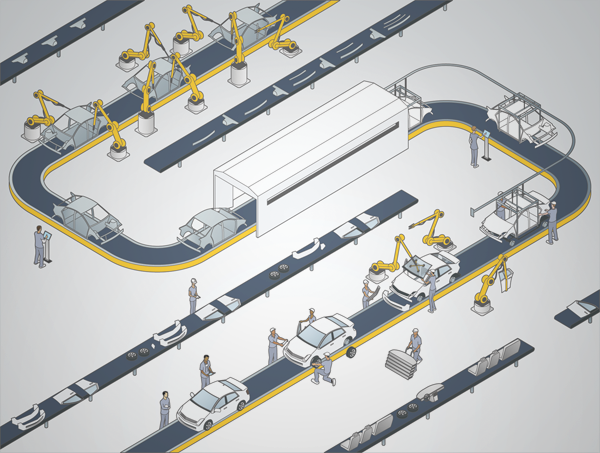
The pipeline is another loaded term. We lend its usage from the lean manufacturing process. The basic intuition is that each software change should go through an automated code quality verification assembly line instead of using a manual, artisan like approach to review the changes.
To achieve that we need a clear process to guarantee software quality after every change. CI pipelines can vary a lot depending on tools, type of project and many other factors, but a common flow has these steps.
- Pushing to the code repository
- Running Static code analysis
- Unit testing
- Manual code revision
- Merge code on the main branch
An android library example
CI/CD tools can help a team automate their development, deployment, and testing. Some tools specifically handle the integration (CI) side, some manage development and deployment (CD), while others specialize in continuous testing or related functions.
One of the best known open source tools for CI/CD is the automation server Jenkins. Jenkins is designed to handle anything from a simple CI server to a complete CD hub.
You can even use GitHub with Jenkins, via the ghprb-plugin to set up a pipeline workflow to be triggered after a Pull Request is opened.
Let’s take a look at how this flow works on an android library project.
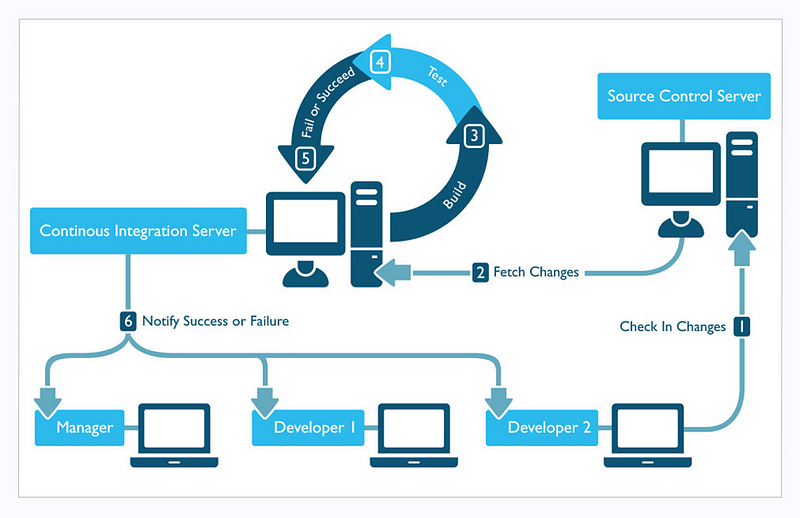
Our Pipeline
 This is an overview of our final pipeline. Now let’s see what each stage does.
Opening a Pull Request
This is the starting point. Developers should open a pull request where they explain the context of ther code changes. Every project have their own pull request process and that should be clear to everybody contributing on to the code-base. This pull request should trigger a CI build. While that happens, other developers can contribute to the PR making questions and reviewing the code.
Merge
Your integration server will then checkout the code on your branch and merge with the main branch. If there are issues here, your build will fail and that is reported directly on the PR.
Static analysis
In this pipeline this stage does two things using the same tool:
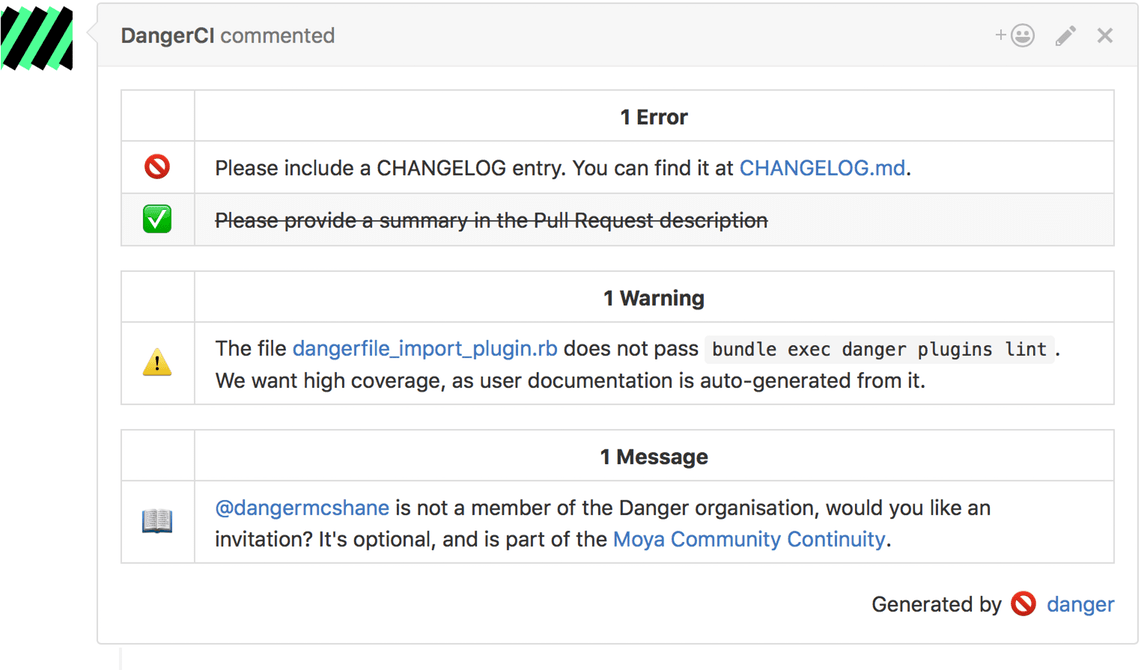
Code Review Automation
To improve the code review process you can automate some parts of it. To do that you can
use Danger. This tool “provides another logical step in your build, through this Danger can
help lint your rote tasks in daily code review.” This way you can codify your team norms. E.G.: PRs with no
description or with no tests are instantly reported back directly on the PR, speeding up the review process.
Actual static analysis
Static analysis is done on the code base of the application without the need to run the software. The goal here is to ensure the code doesn’t have bugs and conforms to standard formatting and styling. You might want to check this article I’ve written about it with my approach for Kotlin projects.
Ideally, developers should have fast feedback for issues during this step, so they can start fixing them ASAP.
To do that, I’ve forked the danger-checkstyle-format plugin and added
some changes to enable reporting issues from both ktlint and detekt directly on the PR, making developer iteration
faster. Check it out.
Build
In this step we use a gradle task to build our code.
Test
Here we run all unit tests, also with gradle.
Publish reports
This step happens after the pipeline has finished. It runs jacoco jenkins plugin, a java code coverage tool to create coverage reports, then we store the test results in Jenkins. This provides a way for us to track code coverage and investigate flaky tests later on.
Bonus
You can also add some basic commands to your Jenkins pipeline, like the rebuild or rerun-tests commands. To help you
work around flakiness on your project’s build or testing stages.
Conclusion
The benefits you get from having a CI pipeline in place pile up like Loan Shark interests. I strongly advise that you and your team consider creating one. If you already have one, I’d love to hear some other stages or ideas you’ve added to it. Please share in the comments =)